兄弟们请收下,004!
第一步:工程目录下-->build.gradle配置如下:
buildscript {
repositories {
...
mavenCentral()
...
}
}
第二步:app目录下-->build.gradle配置如下:
dependencies {
...
//facebook这里会随着升级数值发生变化
implementation 'com.facebook.android:facebook-android-sdk:[5,6)'
...
}
第三步:AndroidManifest.xml配置如下:
参数:
<meta-data android:name="com.facebook.sdk.ApplicationId"
android:value="@string/facebook_app_id"/>
主件:
<activity
android:name="com.facebook.FacebookActivity"
android:configChanges= "keyboard|keyboardHidden|screenLayout|screenSize|orientation"
android:label="@string/app_name" />
权限:
<uses-permission android:name="android.permission.INTERNET"/>
第四步:strings.xml配置如下:
<string name="facebook_app_id">替换为申请的ID</string>
第五步:代码-->继承Application
public class MyApplication extends Application {

    @Override

    public void onCreate() {

        super.onCreate();

        // Facebook统计开启

        AppEventsLogger.activateApp(this);

    }

}
第六步:统计代码如下:
方式1:
AppEventsLogger logger = AppEventsLogger.newLogger(Context context);
logger.logEvent("自定义事件名称" );
方式2:
AppEventsLogger logger = AppEventsLogger.newLogger(Context context);
logger.logEvent("自定义事件名称" , int数值 );
方式3:
AppEventsLogger logger = AppEventsLogger.newLogger(this);
Bundle bundle = new Bundle();
bundle.putString("name" , "sunjie");
bundle.putString("age" , "32");
bundle.putString("sex" , "男");
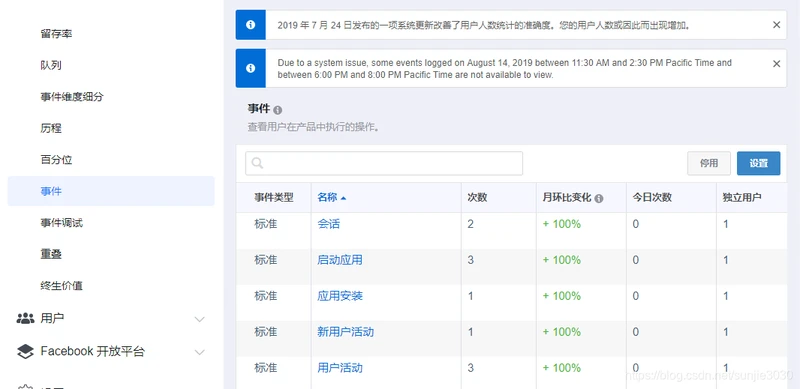
logger.logEvent("MyCustomEvent" , 1 , bundle);效果如图: